The Minting Process
Taking a piece of metal from irregular chunk to standardized coin is an involved process. It takes skill and patience to perfect the striking of coins; as a result, most ancient coins are not uniform, unlike what we are used to today. How exactly was this transformation from rough metal to a small work of art accomplished without modern technology?
Click here for a video of the whole process via The Art Institute of Chicago.
First, the issuer in charge of minting the coins would decide what images should be featured. He could get this order from a higher ranking individual or that may be part of his assigned duties.
Obverse and reverse are words used to describe the "heads" and "tails" side of a coin. The obverse side is the "front" of the coin, usually bearing a portrait, and the reverse is the "back," which often has a reference to the city in which the coin is being minted or the powers in charge of minting it.
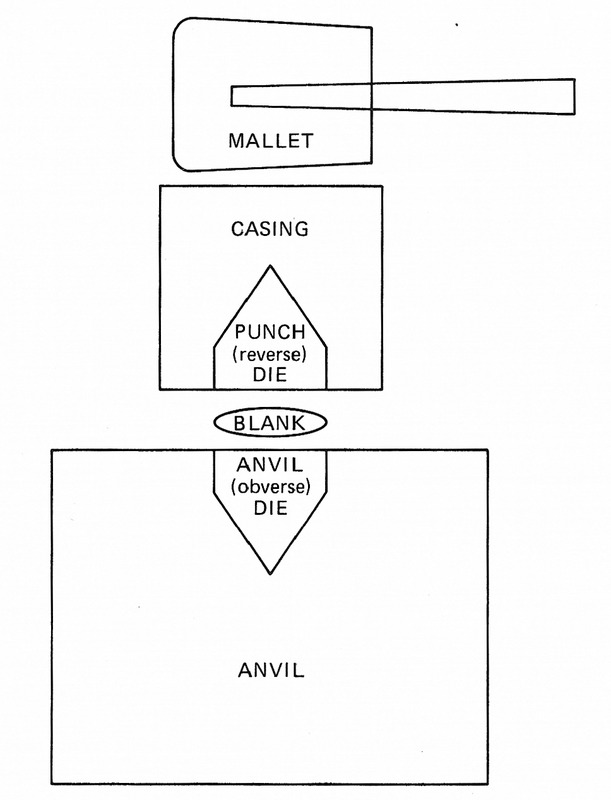
An artist would then carve two dies, the means by which the images are transferred on to a blank piece of metal. A die had a mirror carving of the intended image and was carved from a harder metal that could stand up to the constant punching it would soon endure.
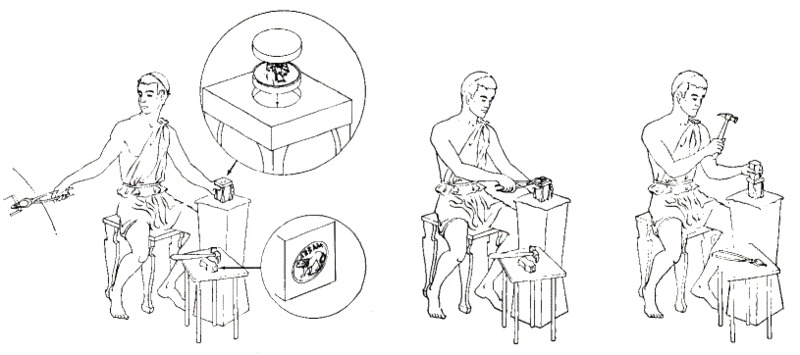
Once the carvings were finished, the obverse die, also called an anvil die, was placed in an anvil, and the reverse die, or punch die, was fitted into a casing.
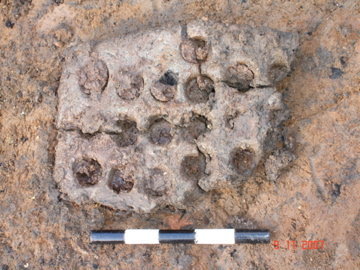
Meanwhile, silver, gold or an alloy was heated to a melting temperature and poured into a different mold that had one to two dozen small circular indentations. The metal cooled into small, circular, smooth pieces called flan or blanks.
The still slightly malleable blanks, after being individually weighed to ensure standardization, were now ready to be struck.


